Encountering the “File size exceeds limit” issue on WordPress?
This guide will walk you through solving the problem. The easiest way will be to update your wp-config file.
To increase the WordPress memory limit by editing the wp-config.php file, follow these steps:
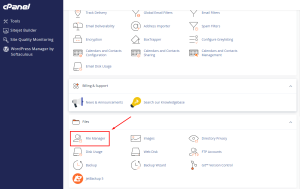
1. Login to your cPanel account and Click on File Manager.

Increase Upload Size
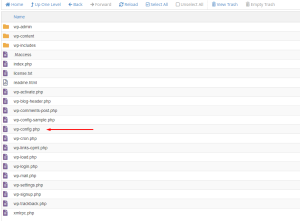
2. Locate the wp-config.php file:
-
- The wp-config.php file is located in the root directory of your WordPress installation, usually under /public_html/.

Increase Upload Size 2
3. Edit the wp-config.php file:
-
- Open the wp-config.php file in the file editor in your control panel.
4. Add the memory limit code:
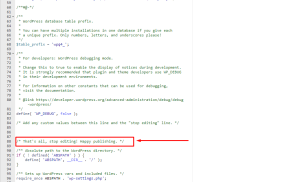
- Find the line that says:
/* That's all, stop editing! Happy publishing. */
near the bottom of the file.
-
-

- Increase Upload Size 3
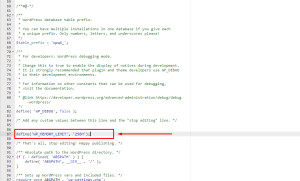
- Just above that line, add the following code to increase the memory limit (you can adjust the memory size as needed):
-
5. Save the file:
- After adding the code, save the changes to the wp-config.php file.
6. Check if the memory limit has been increased:
- You can verify if the memory limit has increased by going to Tools > Site Health in your WordPress dashboard, or by checking your system information through a plugin like WP Server Info.
This should resolve memory-related issues on your WordPress site, such as those caused by large plugins or media uploads. If you’re still encountering issues, you may need to check with your hosting provider to ensure they allow higher memory limits.

