How to upload wordpress theme via file manager in the cpanel.
1. Login to your cPanel and click on File Manager. This takes you to your file manager section

Screenshot 7 1
2. Double Click on Public_html directory on your left. The directory opens showing a list of your wordpress files.
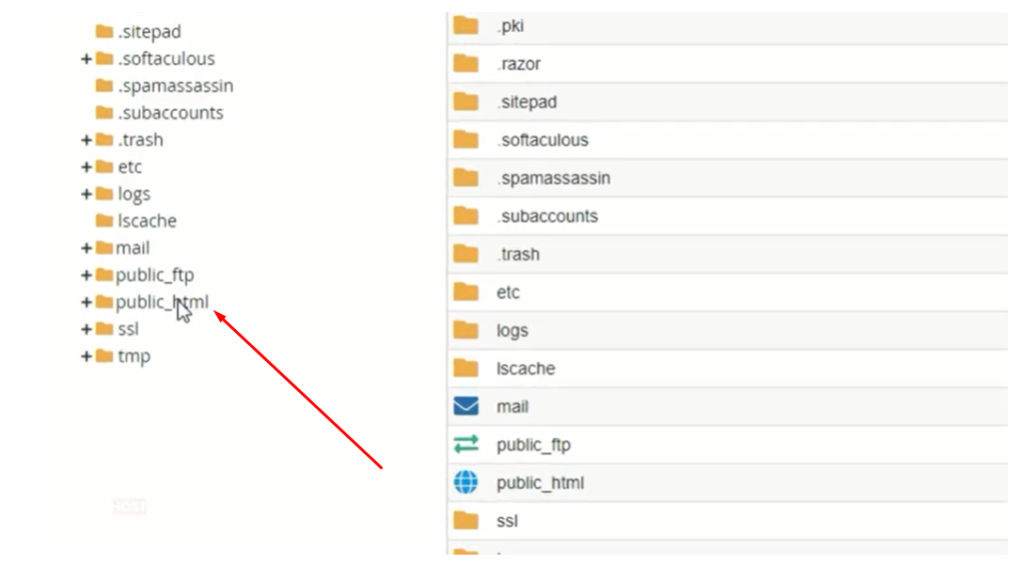
Screenshot 8 1
3. Click on the wp-content folder.

Screenshot 9 1
4. Click on the theme folder. The folder opens showing the list of theme you have installed.
Note: Ensure your folder/file is zipped before the upload
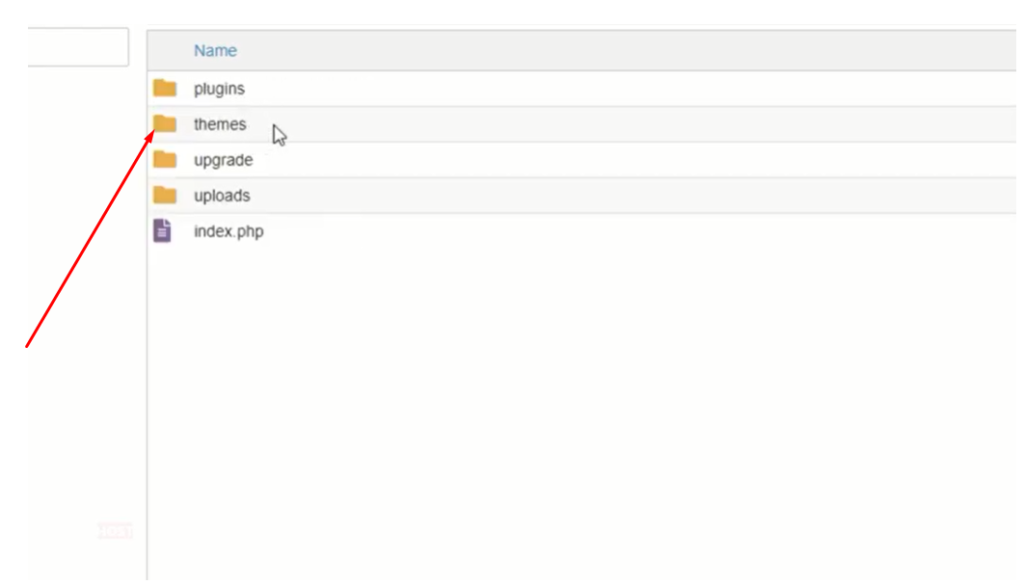
Screenshot 10 1
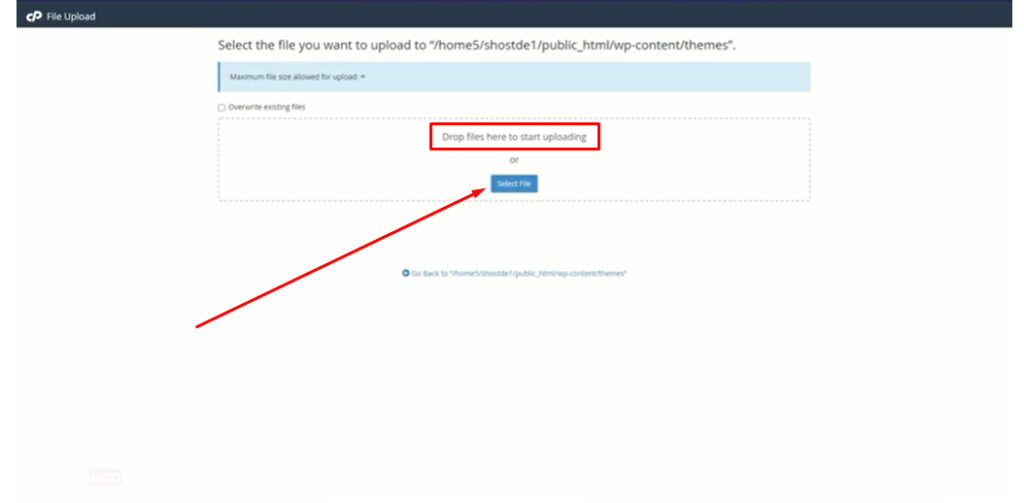
5. Click on Upload on the top left menu. The upload page opens.
You can Drag and Drop your theme files to start uploading OR Click on Select File to choose your theme file.
Screenshot 14 1
6. Wait for the Upload to finish completely. 100% with the Green Color and Click Go back, to move back to the themes page.

Screenshot 36
7. The diza theme has been uploaded.

Screenshot 39
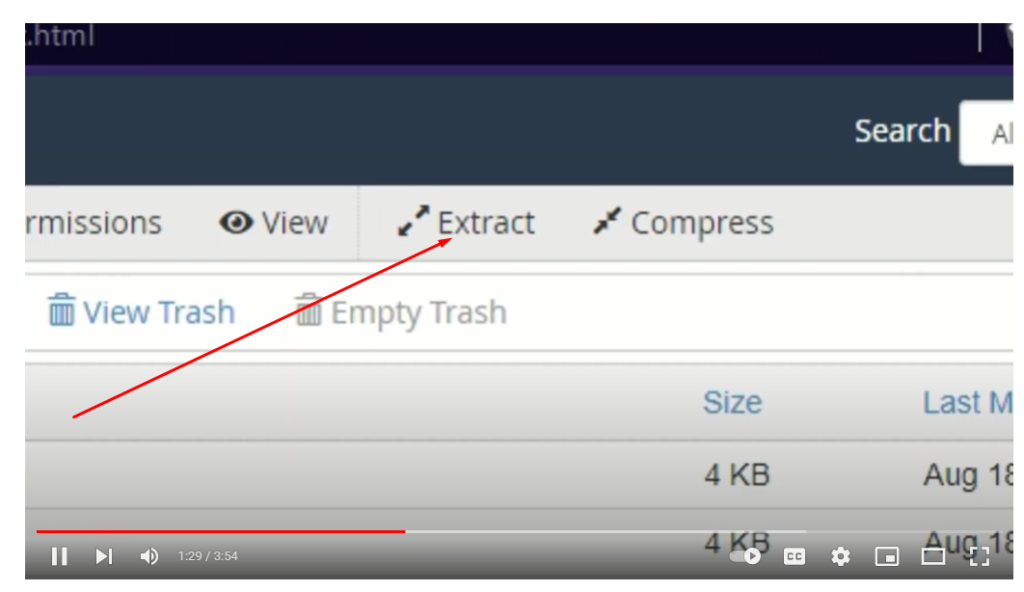
8. To extract the files, Click on Extract on the top menu.
Screenshot 15
9. A pop-up appears. Click on Extract Files.

Screenshot 16
10. After that, Click on Close.

Screenshot 17
11. Click on Reload on the top menu to reload the page.

Screenshot 18
12. Upload Successful
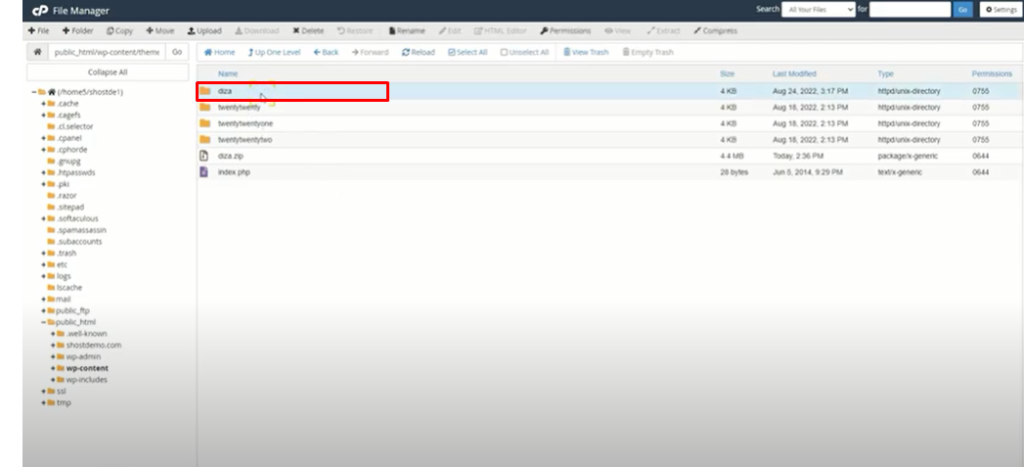
Screenshot 19
13. To activate the theme, login in to your wordpress dashboard. Hover the mouse on Appearance and click on Themes.
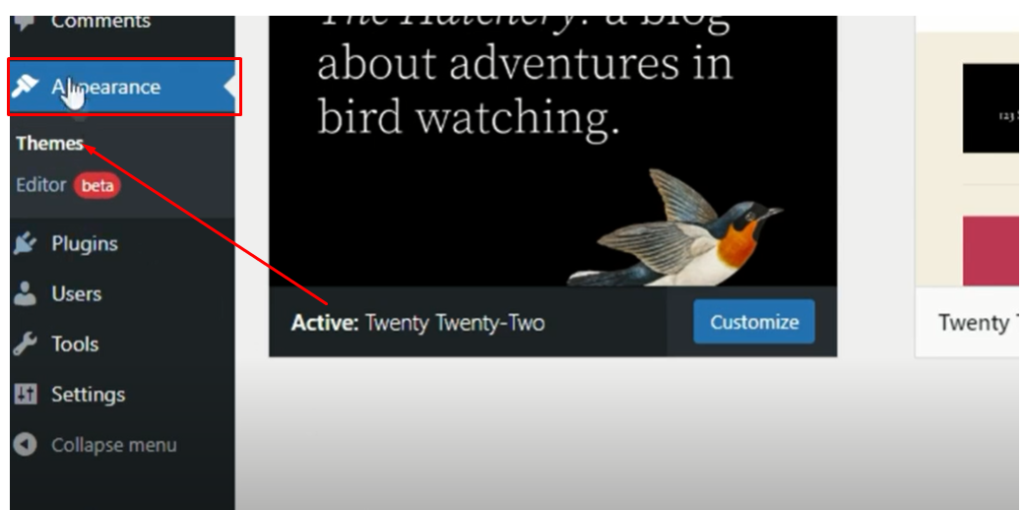
Screenshot 20
14. Click on Activate to activate the theme
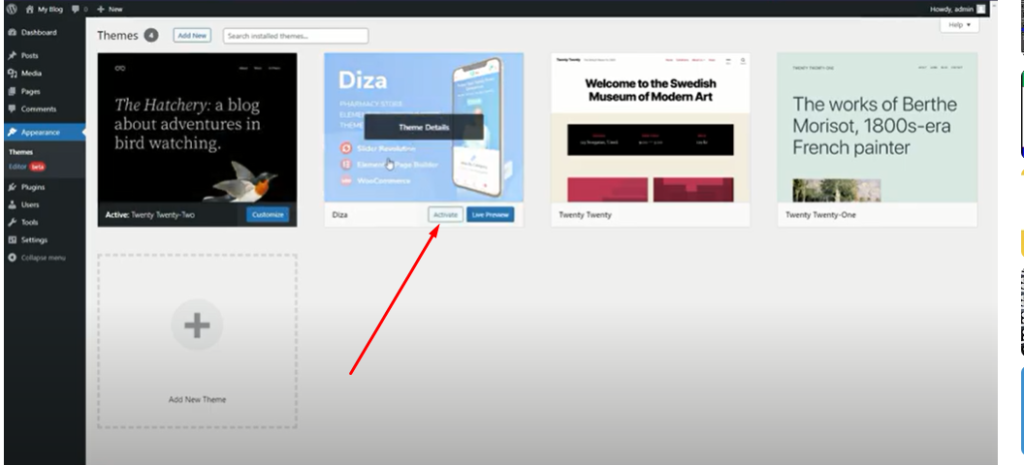
Screenshot 21
How to upload wordpress plugin via file manager in the cpanel.
1.Login to your cPanel and click on File Manager. This takes you to your file manager section.

Screenshot 7 1
2. Double Click on Public_html directory on your left. The directory opens showing a list of your wordpress files.

Screenshot 8 1
3.Click on the wp-content folder.

Screenshot 9 1
4.Click on the plugin folder. The folder opens showing the list of theme you have installed.
Note: Ensure your folder/file is zipped before the upload
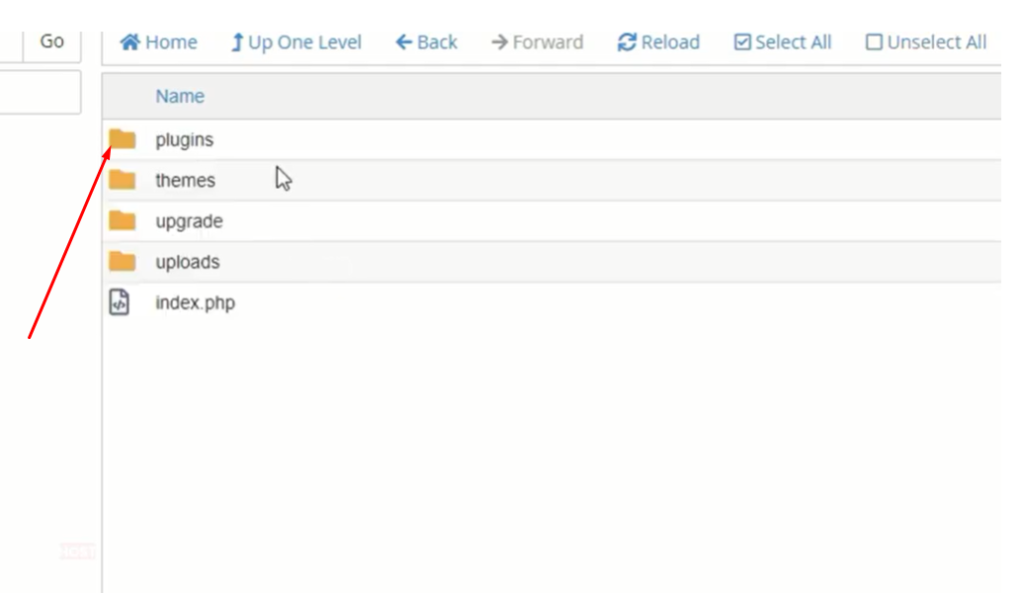
Screenshot 22
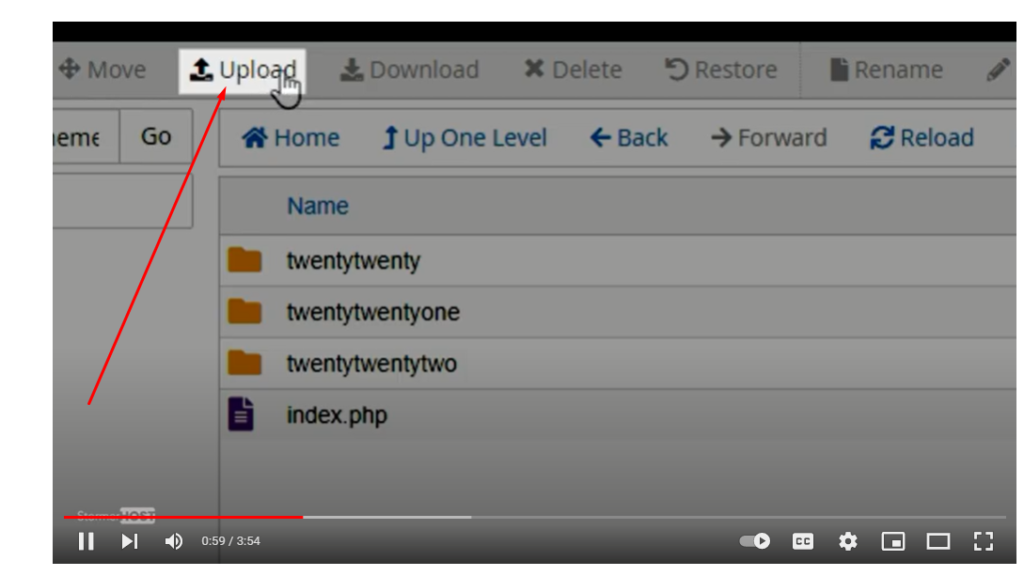
5.Click on Upload on the top left menu. The upload page opens.
You can Drag and Drop your plugins files to start uploading OR Click on Select File to choose your plugin file.
Screenshot 11
6. Wait for the Upload to finish completely. 100% with the Green Color and Click Go back, to move back to the plugins page.

Screenshot 24
7. The js composer plugin has been uploaded. To extract the files, Right Click on plugin and select Extract.

Screenshot 25
8. A pop-up appears. Click on Extract Files.

Screenshot 26
9. After that, Click on Close.

Screenshot 27
10. Click on Reload on the top menu to reload the page.

Screenshot 18
11. Upload Successful

Screenshot 29
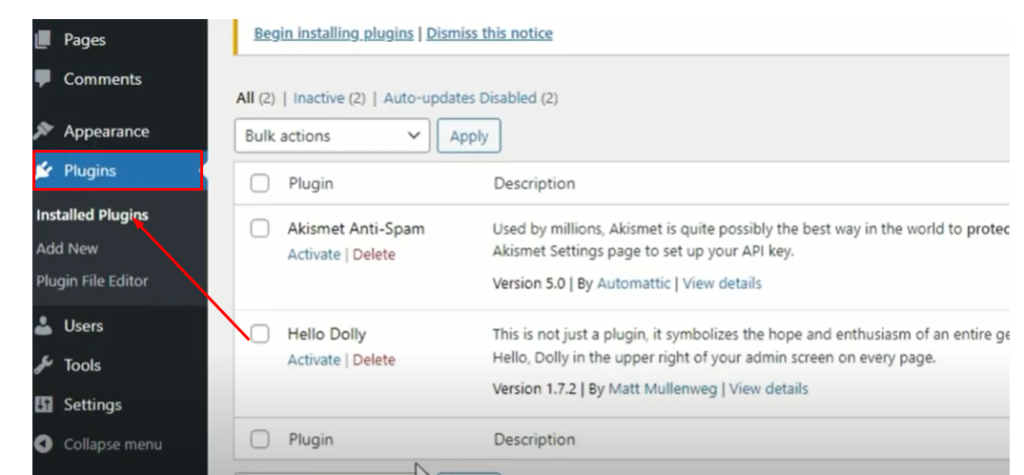
12. To activate the plugin, login in to your wordpress dashboard. Hover the mouse on Plugins and click on Installed Plugins.
Screenshot 30
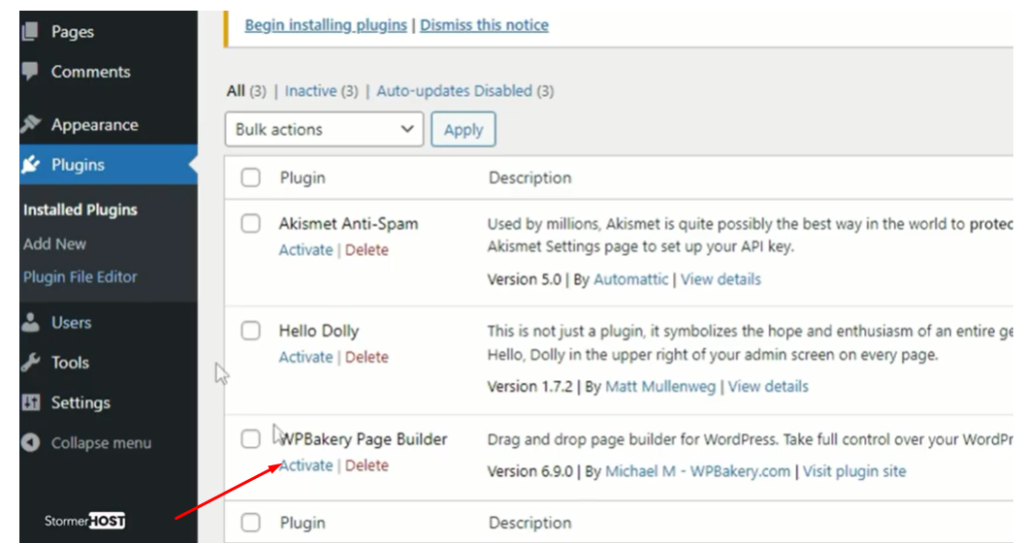
13. Click on Activate to activate the Plugin.
Screenshot 31
