Video Guide:
Step-by-step guide with pictures:
1.Visit “https://filezilla-project.org/” for a free FTP server client. Click “Download FTP Server Client”

2.Download and install FTP server client.

3.Start the FileZilla FTP Client.
- Enter your domain name for Host field (eg. mynewwebsite.com).
- Enter username (Copy and paste username from Hosting Account Welcome Guide) for Username field.
- Enter username(Copy and paste username from Hosting Account Welcome Guide) Password field.
- Enter port 22 for for SFTP (Secure File Transfer Protocol) connection or port 21 FTP(File Transfer Protocol). We recommend you use port 22 for SFTP.
- Click Quickconnect to establish connection.

4. Click Ok..
5. You should be able to access content in your hosting account after successful connection as shown in the image below…
6. Open public_html directory (Note: Website content has to be uploaded to the public_html directory).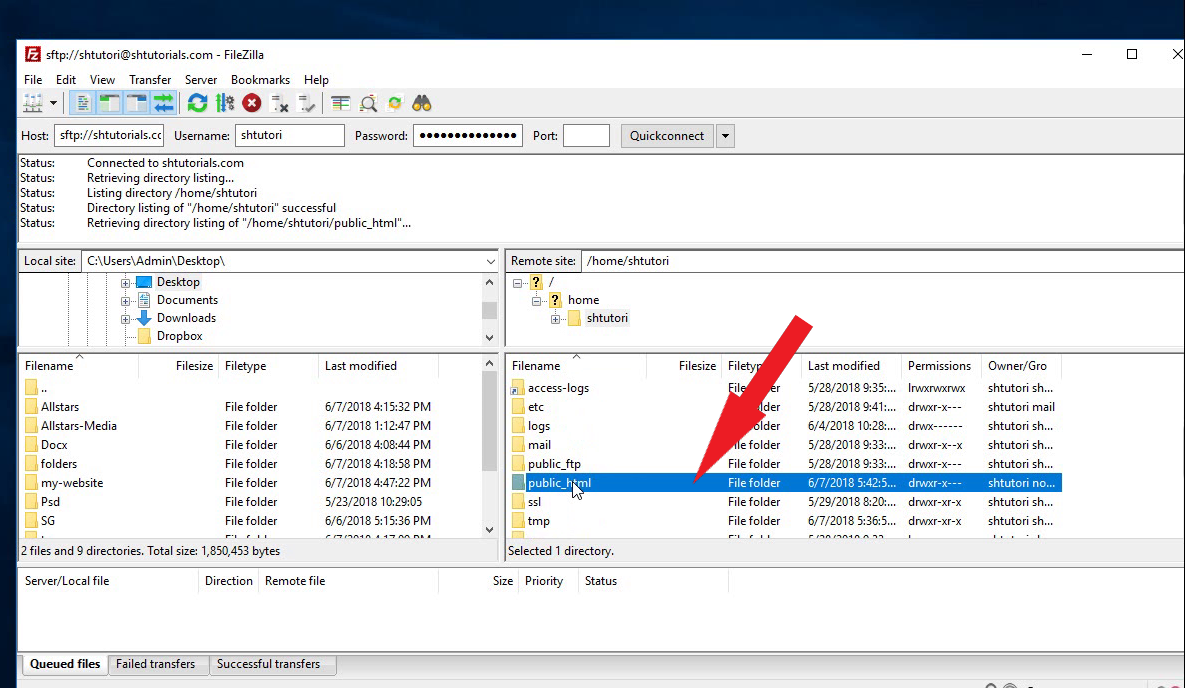
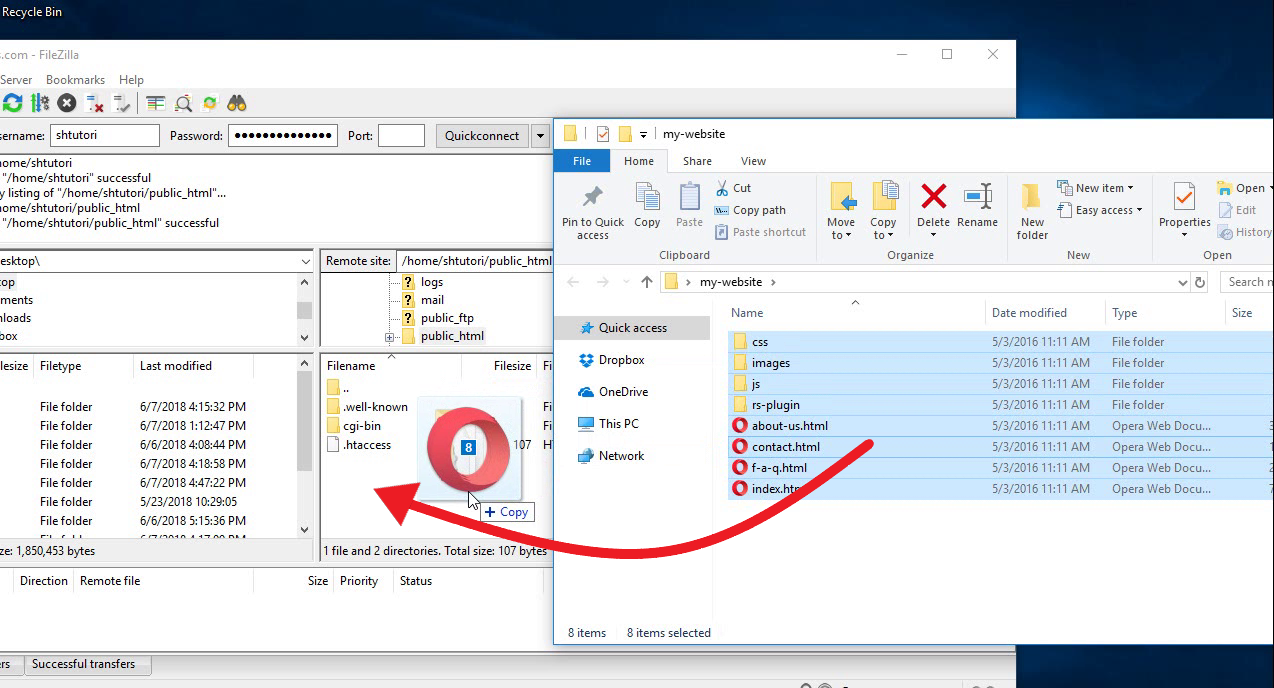
7. Open folder containing your website files on your PC(or local site ) and select all the website files. Drag and drop the website files into the public_html folder to upload files to your hosting account or remote site as shown in the image below ( or browse for your website files on your left, right-click and select “Upload ” to upload files to your server ).
8. Wait for transfer to complete.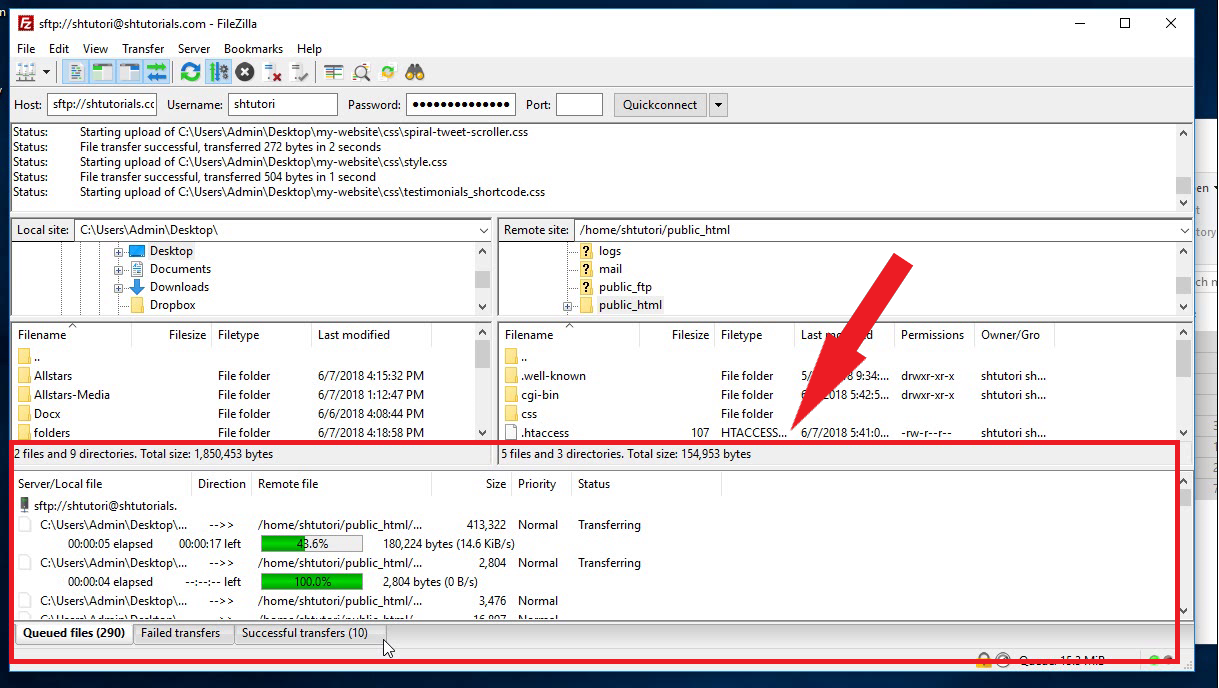
Please note: Please make sure you open the public_html folder (not public_ftp) before uploading your website files, else your website upload would not work.
You may test out your uploaded files by visiting the domain name in use when transfer is complete.
Done! 🙂