Deploying a Django application on cPanel can seem challenging at first, but with the right steps, it becomes manageable. cPanel supports Python applications through its Setup Python App feature, which allows you to run Django projects efficiently. Below is a step-by-step guide to deploying your Django app on cPanel.
Step 1: Log in to cPanel

Setup Python
Step 2: Create a Python Application
- In cPanel, locate the Setup Python App feature (under the Software section)

Setup Python -1
- Click on Create Application.

Setup Python -2
- Choose the Python version required for your Django project (e.g., Python 3.9 or above).

Setup Python -3
- Specify the application root directory (e.g., pytest), which will house your Django project.

Setup Python -4
- Specify the application URL (e.g., https://mydomain.com or a subdomain).

Setup Python -5
- Click Create to set up the Python application.(Leave the Application Startup file and Application entry point blank, the system will automatically setup)

Setup Python -6

Setup Python -7
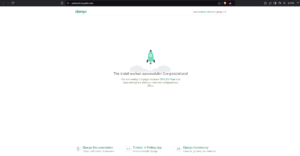
7. Click on the Open button by the Application URL or visit the domain used to verify the application is active.

Setup Python -8
Step 3: Setup Django
- Copy the command by clicking on the command in the python application page.

Setup Python -9
2. Open terminal on the cPanel dashboard, paste the command and hit enter.(If terminal is not enabled, contact support)

Setup Python -10
3. Print the current directory by running the command “pwd” afterwards install Django by running the “pip install django“.

Setup Python -11
3. Create the django project folder by running: “django-admin startproject projectname .”.(Note: change the projectname to your preferred project name)

Setup Python -12
4. On the python application page, update the Application startup file to the wsgi.py in the django directory, that is : “projectname/wsgi.py“.

Setup Python -13
5. In the File Manager, open the application directory. Open the Django(projectname) directory and locate the settings.py file.

Setup Python -14

Setup Python -15
6. In the settings.py file, search for “ALLOWED HOST=[]“. In between the parenthesis, type in the domain or subdomain name the application will be hosted.
(Example: ALLOWED HOST=[‘pytest.shostguide.com’])

Setup Python -16
7. Restart the python application.

Setup Python -17
8. The Django application is live.

Setup Python -18
