You need to take several simple steps in order to link or connect your domain to your blogger. This article will guide you through the process.
Video Guide:
Step by step guide with pictures/images:
In this tutorial we will connect the domain www.shdemo.com to “sh-demo.blogspot.com”.
If you have not or never purchased a domain name before, here is a guide which will help you to order or register a new domain in less than 10 minutes:
You need to have these two things to follow this tutorial:
- Your BlogSpot blog up and running (eg. https://sh-demo.blogspot.com)
- You have access to your domain name (eg. shdemo.com)
CNAME:
| www | ghs.google.com |
| mxzqd7mwe3kp | gv-gm4gqkvbqwhzhi.dv.googlehosted.com (PLEASE NOTE: YOUR VALUES WILL BE DIFFERENT!) |
Setting up CNAME for BlogSpot Custom-Domain Name in your domain control panel.
Here you will need to create 2 records for your domain:
– CNAME for www mapped to ghs.google.com
– CNAME with values provided in the Blogger account
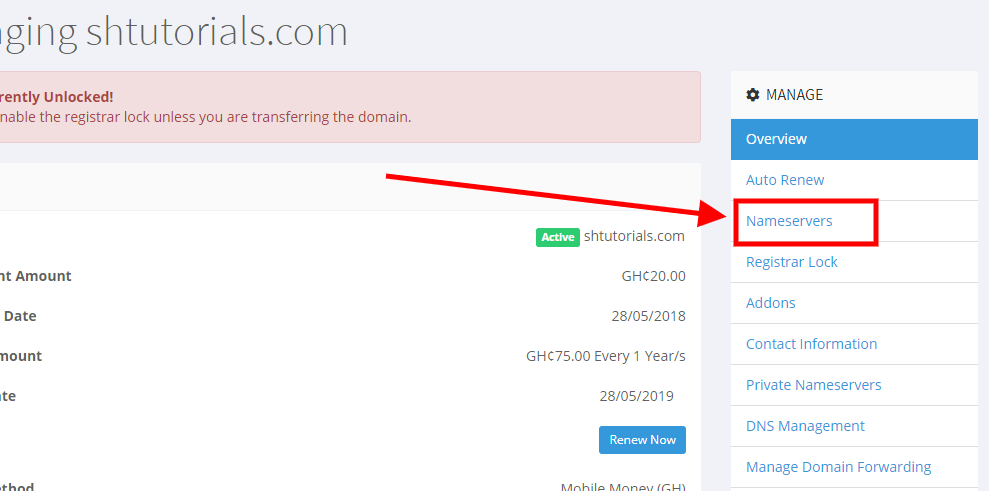
- Login to your Client area, and select Domains.

- Click on “Manage Domain“.

- Select Nameservers.
- Check domain nameservers. Please update domain nameservers to:
ns5.stormerhost.com,
ns6.stormerhost.com,
ns7.stormerhost.com,
ns8.stormerhost.com if different (VERY IMPORTANT!).
- Login to your Blogger Account. Select Settings

- Scroll down to Publishing. Select Custom Domain

- Enter your domain name. Begin with www.domain name

- A pop-up appears. Create CName records first with this

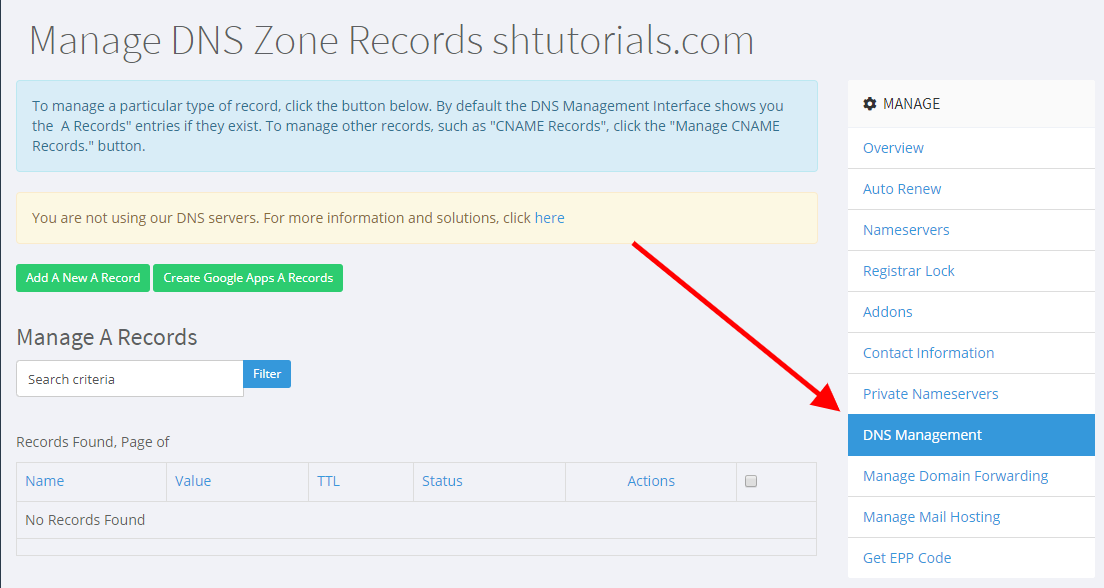
- Now lets go to DNS Management. Select DNS Management.
 We Scroll down and click on Mange CNAME Records.
- We will now create CNAME Records. Click on Add A New CNAME Record

- Add the first CNAME Records here. Click Add Record after that

- Scroll down again and click on Manage CNAME Records
- Click Add CNAME Records again.
- Add the second CNAME Records. Click Add Records after that and wait for about 30mins.

- Go to Settings in your Blogger Account.
- Scroll down to Publishing. Select Custom Domain
- Enter your domain name. Begin with www.domain name

- If successful, it will be saved in your custom domain

- Finally, enable Redirects Domain and HTTPS Availability

- Enter your custom domain in your browser to access your blogger website

- .Good Job! We are almost done. Now once you have setup CNAME , you need to wait for 5 minutes to 4 hours for this changes to reflect globally. It can take approximately 30 minutes for newly-created host records to take effect. You need to go back to your BlogSpot dashboard. If the CNAME record has been updated globally, this time instead of showing error “We have not been able to verify