Please follow these instructions in order to set up your email created with cPanel email account on iPhone.
As an example, we are going to use info@shostdemo.com address and mail.shostdemo.com host name, replace them with your own information.
1. Select Settings from the home screen of your iPhone:

Screenshot 2 1
2. Scroll down and Choose Mail:

Screenshot 3 1
3.Select Accounts and click on Add Account:

Screenshot 4 1

Screenshot 5 1
4. Choose Other from the appeared list:

Screenshot 6
5. Select Add Mail Account.

Screenshot 7 1
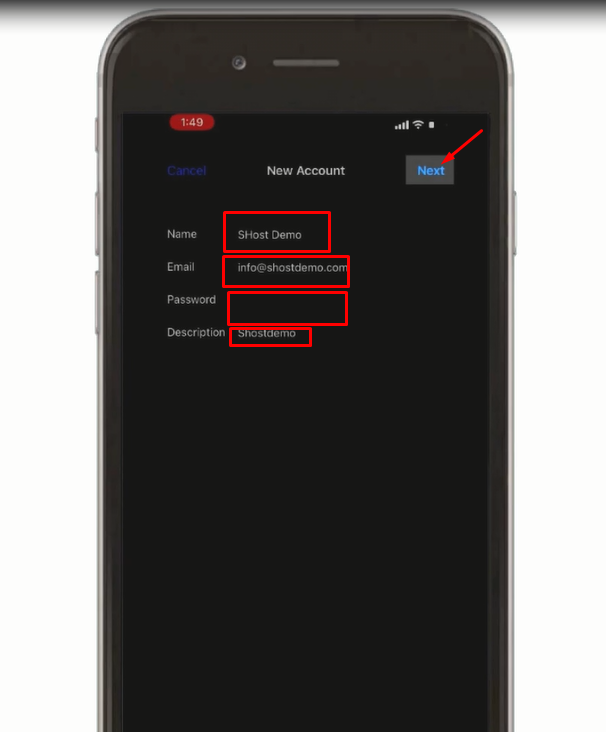
6. In the New Account menu, you will need to specify the following records:
Name: your name, it will appear as a sender name
Address: email address that was created in your cPanel > Email Accounts menu
Password: password for this email address
Description: you can specify any description, but we advise you to specify your email address
Click on Next.
Screenshot 9 2
7. Select protocol type: IMAP or POP3. We advise you to use IMAP. The selected one will be highlighted blue.

Screenshot 10
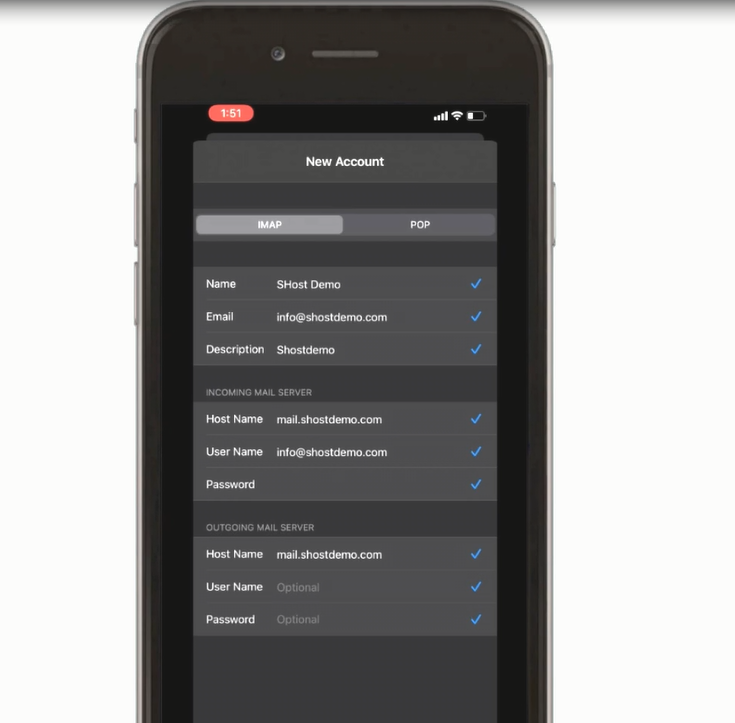
8. Settings are equal both for IMAP and POP3 on this step:
Name, Address and Description should have been already filled in
Host name: server your account is hosted on
User Name: your email address
Password: password for your email
NOTE: your host name would be- mail.yourdomain.com , where yourdomain.com if the domain of your hosting account.
Indicate in the fields for both Incoming Mail Server and Outgoing Mail Server the following settings:

Screenshot 11 1
9. Wait for the verification process to finish:
Screenshot 12 2
Click on Next. If you get error message “Cannot verify Server details“, please check and make sure you put in the correct details of your email account and click Continue
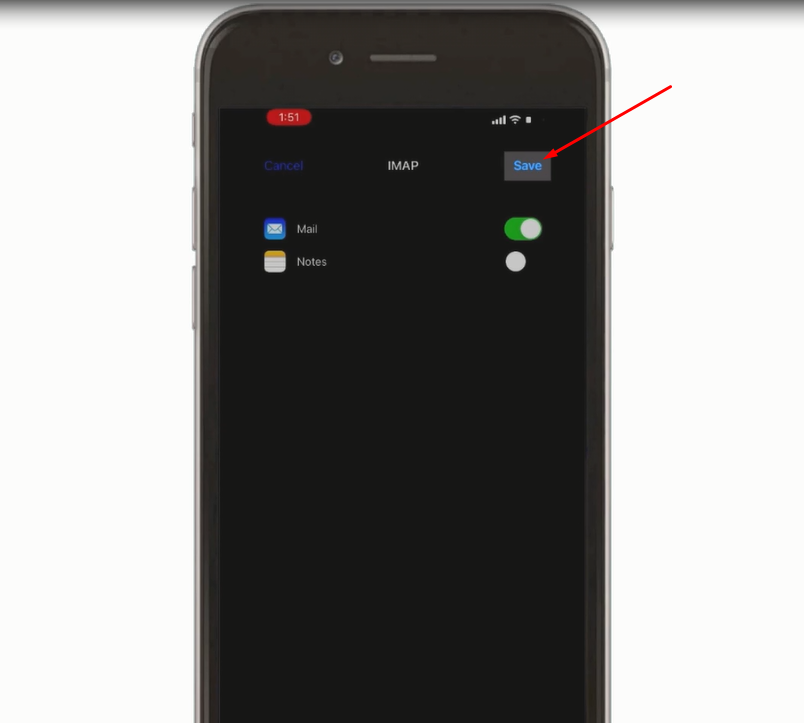
10. If you use IMAP, it is possible to enable the following services:
Click on Save and wait till checking is finished.
Screenshot 13 2
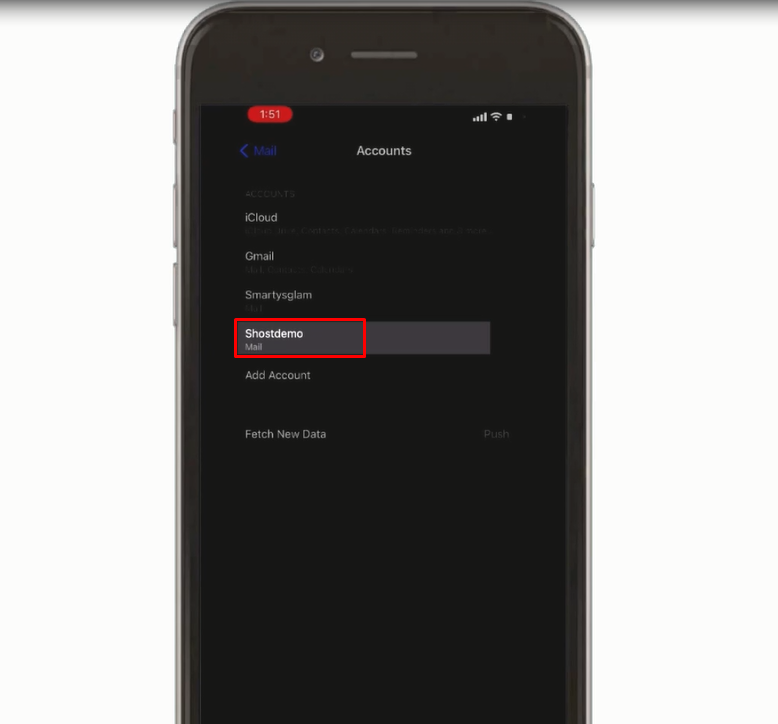
11. Email setup is successfully:
Screenshot 14 1
How to Access Email Account:
12. Select Mail from your home Screen:

Screenshot 15 1
13. Tap on the Account Name (E.g. ShostDemo):

Screenshot 16 1
14. It takes you to the inbox page of your account:
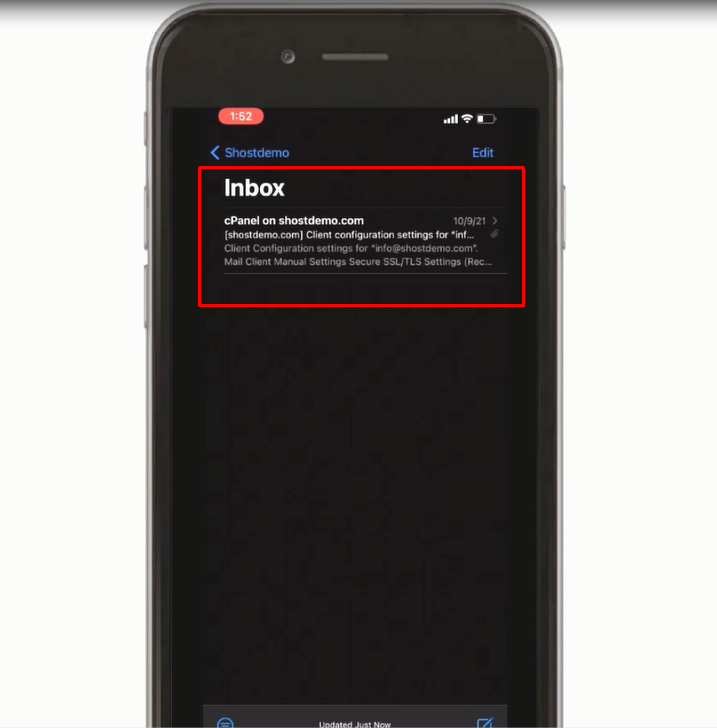
Screenshot 17 1
How to Delete Email Account:
15. Select Settings from your home screen.
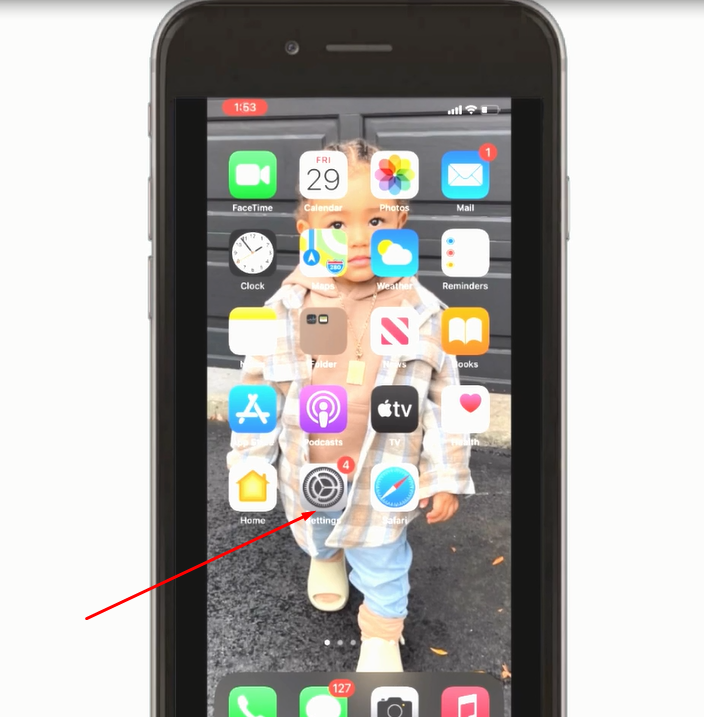
Screenshot 18 1
16.Scroll down and select Mail:

Screenshot 19
17.Select Accounts:

Screenshot 20
18. Tap on the Name of the Email Accounts you want to Delete(e.g. ShostDemo):

Screenshot 21 1
19. Tap on the Delete Account:

Screenshot 22 1
20. A pop-up appears. Tap on the Delete Account:

Screenshot 23 1
21. Your Custom Email is Deleted:

Screenshot 24 1
Done! 🙂
